Custom Patch Digitizing Guide 2026 | How Embroidery Digitizing Works & Common Mistakes
Digitizing is the most critical yet most overlooked step in custom patch production. Even if you have perfect high-resolution artwork, poor embroidery digitizing will turn your clean logo into blurry, distorted, messy patches with merged lines, jagged edges, and uneven stitching.
Many customers assume “good artwork = good patches”. In reality, the digitizing file determines 80% of your final patch quality. Digitizing is the process of converting flat PNG, JPG, AI, or PDF artwork into a machine-readable stitch file that tells embroidery machines exactly where to place threads, stitch density, direction, and color sequencing.
This 2026 complete digitizing guide explains the full patch digitizing process, professional quality standards, frequent digitizing failures, and how to ensure your custom embroidered patches come out sharp, clean, and professional every single time.

1. What Is Embroidery Patch Digitizing?
Embroidery digitizing is the technical process of translating 2D digital artwork into a programmable stitch layout for industrial embroidery machines.
Regular image files only contain color and pixel information. Embroidery machines cannot read pixels—they need precise instructions for:
- Stitch placement angle
- Stitch density thickness
- Underlay stitch foundation
- Color stop sequencing
- Border contour stitching
- Jump stitch trimming
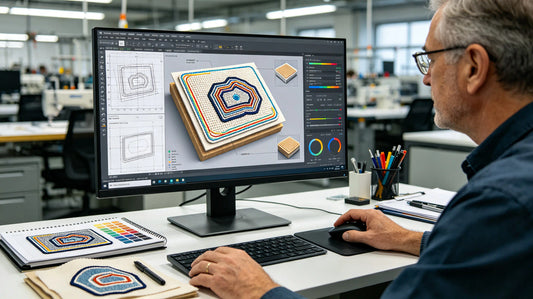
Professional digitizers manually rebuild your design using specialized embroidery software, laying thousands of individual stitches to match your original logo shape while adapting for the physical limitations of thread and fabric.
2. Full Patch Digitizing Production Process
Step 1: Artwork Analysis
Digitizers review your file resolution, line thickness, text size, color layers, and design complexity. They remove unprintable tiny details and adjust proportions to fit patch embroidery standards.
Step 2: Underlay Stitch Setup
A foundational underlay stitch layer is added first. This locks the base fabric, prevents thread sinking, and eliminates wrinkling or puckering on dense patch fills.
Step 3: Main Stitch Mapping
Digitizers assign stitch types for different sections:
- Satin stitches for clean sharp borders and thin lines
- Fill stitches for large solid color areas
- Running stitches for fine outlines
- Density-adjusted stitches for curved shapes
Step 4: Color Sequencing
Colors are ordered logically to avoid machine jumping, thread overlap, and shadow bleeding. Proper sequencing prevents messy cross-color contamination.
Step 5: Final Border & Trimming Programming
Outer edge stitches are locked, jump stitches are minimized, and trim commands are added for clean finished patches.
Step 6: Virtual Test Run
The digitized file is simulated to check for merged areas, loose stitches, or density errors before mass production.

3. Three Main Stitch Types Used in Patch Digitizing
Satin Stitch
Satin stitches create smooth, shiny, crisp lines. Ideal for borders, text strokes, outlines, and thin logo elements. High-quality patches use clean satin stitching for all fine details.
Fill Stitch (Tatami Stitch)
Uniform grid fill stitches cover large solid color areas. They create even texture, prevent fabric show-through, and maintain consistent color saturation across large patch surfaces.
Running Stitch
Single thin stitch lines used for ultra-fine accents, subtle outlines, and secondary details. Running stitches are delicate and cannot support thick coverage.
4. What Makes a High-Quality Digitized Patch File?
Consistent Stitch Density
Premium digitizing maintains balanced density across the entire patch. Too loose = fabric shows through; too tight = thread bunching, puckering, and stiff patches.
Minimal Jump Stitches
Poor digitizing creates hundreds of unnecessary jump stitches that require excessive trimming and leave tiny holes across the patch surface. Professional files eliminate waste jumps.
Proper Underlay Foundation
Patches without underlay stitches sink into the base twill, resulting in dull, flattened logos after washing. Good underlay ensures raised, vibrant texture.
Optimized Stitch Direction
Stitch angles follow the shape of curves and letters, creating smooth flowing lines instead of jagged, pixelated edges.
Clean Color Separation
No color bleeding, overlapping threads, or muddy blending between different color sections.

5. Most Common Digitizing Mistakes That Ruin Patches
Overcrowded Small Text
Amateur digitizers attempt to stitch tiny text below 6mm. Thread merges together, turning letters into blurry blobs.
Incorrect Density Settings
Over-dense stitching causes puckering, stiff texture, and thread breakage. Under-dense stitching creates see-through patches.
Missing Underlay Stitches
Results in flat, weak embroidery that fades quickly and loses definition after washes.
Poor Color Ordering
Wrong color sequence creates overlapping threads, covering fine details and distorting original design shapes.
Forcing Complex Gradients
Embroidery cannot print gradients. Bad digitizing tries to replicate shading with messy overlapping thread layers, creating dirty patch texture.
Ignoring Patch Border Lock
Unlocked edge stitching causes fraying, loose threads, and deformed patch shapes.
6. Artwork Rules for Perfect Digitized Patches
Best File Formats
Vector files (AI, EPS, SVG, PDF) produce perfect digitizing results with zero pixelation. High-resolution transparent PNGs are acceptable backups. Blurry JPGs always produce poor patch quality.
Minimum Text Size Rule
Text must be 6mm or taller for clean embroidery. Anything smaller will merge and become unreadable.
No Ultra-Thin Lines
Lines thinner than 1.5mm cannot hold stable satin stitches and will disappear or blur out.
Remove Unnecessary Micro Details
Tiny specks, tiny shadows, micro lines, and intricate textures must be removed before digitizing—they cannot be reproduced in thread.
Simplify Complex Multi-Layer Art
Embroidery works best with solid, separated color blocks. Overly layered digital art requires simplification for clean stitch conversion.

7. Difference Between Amateur & Professional Digitizing
Amateur automated auto-digitizing software simply pixelates images and creates random stitch layouts. It produces fast but low-quality files with messy jumps, uneven density, and distorted shapes.
Professional manual digitizing is 100% human-designed. Experienced digitizers rebuild your logo from scratch, adjusting stitch types, density, angles, and sequencing specifically for custom patch production. This is why professional patches look crisp while cheap auto-digitized patches look blurry and unprofessional.
8. Can You Fix a Badly Digitized Patch?
Once a patch is stitched, the damage is permanent. Thread placement cannot be edited or repaired. The only solution is to re-digitize the artwork with professional settings and reproduce the patch correctly.
This is why pre-production digital proofs are critical—they let you catch digitizing errors before mass manufacturing.
Final Thoughts
Custom patch digitizing is the invisible foundation of every high-quality embroidered patch. Artwork quality only matters if paired with expert manual digitizing. Auto-digitized files always produce low-grade blurry patches, while professional manual digitizing delivers sharp lines, balanced density, clean color separation, and durable long-term stitching.
Understanding digitizing rules helps you prepare better artwork, avoid common design mistakes, and consistently receive premium-grade custom embroidered patches for all your branding and apparel projects.

FAQ
Q: What file type is best for patch digitizing?
A: Vector AI, EPS, SVG and PDF files offer perfect crisp outlines and the best digitizing results.
Q: Why is my patch text blurry?
A: Usually caused by text too small for embroidery, poor auto-digitizing, or insufficient line thickness in your original artwork.
Q: Can embroidery digitizing do gradients?
A: No. Embroidery uses solid thread colors only. Gradients require sublimation patches instead.
Q: Is auto-digitizing as good as manual digitizing?
A: No. Automated software creates messy stitch layouts. Professional manual digitizing is required for clean high-quality patches.
Q: How small can text be on an embroidered patch?
A: 6mm is the absolute minimum readable letter height for standard embroidery patches.
Tags: