How to Design the Perfect Custom Embroidered Patches for Your Brand (Brand-Specific Guide)
Your brand’s identity is more than just a logo—it’s the visual language that connects you to your audience, builds trust, and sets you apart from competitors. Custom embroidered patches are a powerful tool to amplify that identity, turning everyday garments, gear, and promotional items into walking brand ambassadors. Unlike generic patches, custom embroidered patches for brands are designed to align with your brand’s colors, values, and aesthetic—ensuring every stitch reinforces your message. In this brand-specific guide, we’ll walk you through the step-by-step process of designing the perfect custom embroidered patches for your brand, from adapting your logo to choosing the right style, materials, and application strategies. Whether you’re a small business, a large corporation, or a startup, this guide will help you create patches that elevate your brand and leave a lasting impression.

Why Custom Embroidered Patches Are Essential for Branding
In a crowded market, brand recognition is everything—and custom embroidered patches offer a unique, tangible way to stand out. Unlike digital ads or temporary promotions, patches are physical, long-lasting, and highly visible—they travel with your customers, employees, and partners, extending your brand’s reach wherever they go. Custom embroidered patches also add a premium, professional touch to your brand: the dimensional stitching, vibrant colors, and high-quality materials convey quality and attention to detail, which translates to trust in your brand.
For employees, brand patches foster a sense of belonging and pride—whether they’re on uniforms, jackets, or hats. For customers, they’re a way to show loyalty and connect with your brand on a personal level. And for promotional campaigns, they’re a memorable, useful gift that people will keep and wear, ensuring your brand stays top of mind. Simply put, custom embroidered patches are a cost-effective, versatile branding tool that delivers long-term value.

Step 1: Align Your Patch Design with Your Brand Identity
The first and most important step in designing brand-specific custom embroidered patches is to ensure every element aligns with your existing brand identity. Your patch should be instantly recognizable as “yours”—so start by revisiting your brand guidelines and focusing on these key elements:
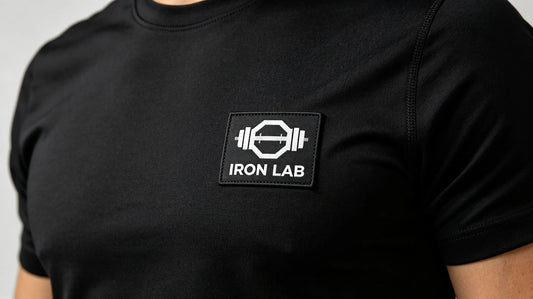
Adapt Your Brand Logo for Embroidery
Your logo is the centerpiece of your patch, but not all logos translate perfectly to embroidery. Follow these tips to adapt your logo for the best results:
-
Simplify Intricate Details: Embroidery works best with clean, bold lines—avoid tiny text, complex patterns, or overly detailed elements that can become blurry or lost in stitching. If your logo has fine details, work with your custom patches supplier’s design team to simplify them without losing your brand’s essence.
-
Preserve Key Brand Elements: Keep the core elements of your logo—like your brand mark, icon, or tagline—intact. These are the elements that make your brand recognizable, so don’t compromise on them.
-
Opt for Vector Files: Submit your logo as a high-quality vector file (AI, EPS, PDF) to ensure crisp, consistent stitching. If you don’t have a vector file, most suppliers offer free design optimization to convert your logo into an embroidery-ready format.
Stick to Your Brand Color Palette
Color consistency is critical for brand recognition—your patch colors should match your brand’s official color palette exactly. Here’s how to ensure accuracy:
-
Use Pantone Color Matching: Provide your supplier with your brand’s Pantone color codes (PMS) to get exact color matches for your patch threads. This ensures your patch matches your website, packaging, and other brand materials perfectly.
-
Avoid Color Clashes: Stick to 2-4 brand colors for your patch—too many colors can make the design look cluttered and distract from your logo. Choose colors that complement each other and align with your brand’s personality (e.g., bold colors for energetic brands, neutral tones for luxury brands).
-
Test Color Visibility: Ask for a free digital mockup to see how your brand colors look in embroidery. Thread colors can look slightly different on screen than in real life, so a mockup helps you confirm the colors before production.
Reflect Your Brand Personality
Your patch should feel like an extension of your brand’s personality. For example:
-
Luxury Brands: Opt for metallic thread embroidery, subtle 2D flat embroidery, or leather-backed patches for a sophisticated, premium look.
-
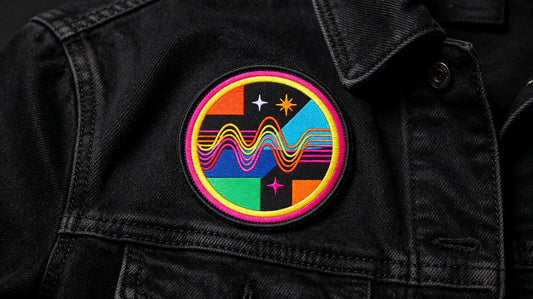
Energetic/Youthful Brands: Choose bold 3D puff embroidery, bright brand colors, or fun shapes to match your vibrant personality.
-
Vintage/Heritage Brands: Go for chenille embroidery or muted, retro color palettes to evoke nostalgia and tradition.
-
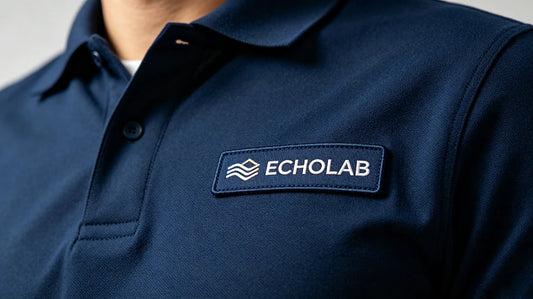
Professional/Corporate Brands: Stick to clean 2D flat embroidery with a simple, professional design—focus on your logo and brand name.

Step 2: Choose the Right Embroidery Style for Your Brand
The embroidery style you choose will impact the look and feel of your brand patch—so select one that aligns with your brand’s aesthetic and goals. Here’s how to match each style to your brand:
2D Flat Embroidery: The Versatile, Professional Choice
2D flat embroidery is the most popular choice for brand patches—it offers a clean, crisp look that works for almost any brand. With 50%, 75%, or 100% thread coverage, you can customize the look to match your brand’s needs:
-
Best for: Corporate brands, professional services, small businesses, and any brand that wants a polished, versatile patch.
-
Brand Fit: Ideal for brands that value professionalism, consistency, and subtlety. 100% thread coverage is perfect for bold brand logos, while 50% coverage works for brands that want a more understated look.
Most custom embroidered patches for brands use 2D flat embroidery because of its versatility and professional appearance.
3D Puff Embroidery: The Bold, Eye-Catching Choice
3D puff embroidery adds depth and dimension to your brand patch, making your logo stand out from the fabric. It’s created with a foam layer beneath the stitching, resulting in a raised, bold look:
-
Best for: Brands that want to make a statement, like streetwear brands, sports teams, or youth-focused businesses.
-
Brand Fit: Perfect for brands with bold, simple logos—intricate details may not translate well with 3D puff. It’s great for hats, jackets, and promotional items where you want your brand to catch the eye.
Chenille Embroidery: The Vintage, Nostalgic Choice
Chenille embroidery offers a soft, fuzzy texture and retro aesthetic that’s perfect for heritage brands or brands with a vintage vibe:
-
Best for: Vintage brands, collegiate brands, fraternities/sororities, and brands that want to evoke nostalgia.
-
Brand Fit: Ideal for brands with a classic, timeless identity—chenille patches add a touch of tradition and warmth, making them perfect for varsity jackets, hoodies, and retro-inspired merchandise.
Metallic Thread Embroidery: The Premium, Luxurious Choice
Metallic thread embroidery uses shiny gold, silver, or colored metallic threads to add a premium, luxurious touch to your brand patch:
-
Best for: Luxury brands, high-end clubs, event brands, and any brand that wants to convey elegance and sophistication.
-
Brand Fit: Perfect for brands that want to elevate their patches—use metallic threads to highlight your logo or add accents, rather than covering the entire patch (which can look overwhelming).
Step 3: Select the Right Backing & Material for Your Brand’s Needs
The backing and material of your patch impact its durability, functionality, and how it’s used—so choose options that align with your brand’s goals (e.g., employee uniforms, promotional items, customer gifts).
Backing Options for Brand Patches
Select a backing that matches how your patch will be used:
-
Iron-On Backing: Perfect for promotional items, customer gifts, or employee apparel that’s easy to customize. It’s convenient and cost-effective, making it a great choice for bulk orders.
-
Sew-On Backing: Ideal for employee uniforms, heavy-duty gear, or items that will be washed frequently. It’s the most durable backing option, ensuring your brand patch stays in place for years.
-
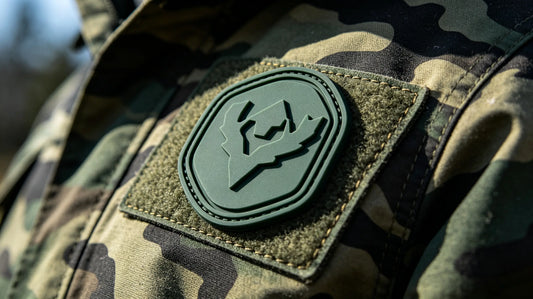
Hook & Loop Backing: Great for tactical brands, sports teams, or brands that want versatile patches (e.g., patches that can be swapped out on different gear). It’s reusable and easy to remove.
-
Self-Adhesive Backing: Perfect for temporary promotions, trade shows, or items like laptops or bags. It’s not as durable as other options, but it’s quick and easy to apply.
Material Tips for Brand Patches
Stick to high-quality materials to ensure your brand patch reflects your brand’s commitment to quality:
-
Threads: Use color-fast, eco-friendly polyester threads—they’re durable, fade-resistant, and soft to the touch. Avoid cotton threads, which fray and fade over time.
-
Backing Material: Choose a durable backing (like twill or felt) that complements your patch’s style. For luxury brands, consider leather backing for a premium touch.
-
Quality Control: Choose a custom embroidered patches supplier with strict quality control—this ensures every patch has clean stitching, consistent colors, and no loose threads, reflecting positively on your brand.

Step 4: Design Tips to Make Your Brand Patch Stand Out
Even with a great logo and the right style, small design choices can make a big difference in how your brand patch is perceived. Follow these tips to create a patch that stands out for all the right reasons:
Keep It Simple & Recognizable
The best brand patches are simple and easy to recognize at a glance. Avoid overcrowding the design with text, graphics, or colors—focus on your logo and key brand elements. Remember: less is more when it comes to embroidery.
Add a Subtle Brand Tagline (If Relevant)
If your brand has a short, memorable tagline (e.g., “Just Do It” or “Think Different”), you can add it to your patch—just keep the text large enough to be legible. For embroidered patches, text should be at least 0.25 inches tall to ensure clarity.
Consider the Size & Placement
Choose a patch size that fits where it will be used: Hats: 2-3 inches (small, compact design)Jackets/Uniforms: 3-4 inches (larger, more visible design)Promotional Items (Tote Bags, Backpacks): 3-5 inches (bold, eye-catching design)Also, consider placement—your patch should be placed where it’s most visible (e.g., the chest of a jacket, the side of a hat) to maximize brand exposure.
Test with a Mockup
Never finalize your design without approving a free digital mockup. A mockup lets you see how your patch will look in real life, including colors, stitching, and size. Most custom patches suppliers offer unlimited mockup revisions, so take the time to tweak the design until it’s perfect.
Step 5: Integrate Your Brand Patches into Your Marketing Strategy
Once you’ve designed your perfect brand patch, it’s time to put it to use! Here are creative ways to integrate custom embroidered patches into your marketing strategy:
Employee Apparel
Add your brand patch to employee uniforms, jackets, hats, or lanyards. This creates a cohesive, professional look and turns your team into brand ambassadors.
Promotional Campaigns
Offer patches as free gifts with purchases, at trade shows, or as part of a social media contest. People love free, useful items—your patch will be worn and seen by new audiences.
Customer Loyalty Programs
Reward loyal customers with exclusive brand patches. This fosters loyalty and encourages customers to show off their support for your brand.
Partnerships & Collaborations
Collaborate with influencers, other brands, or local businesses to create co-branded patches. This expands your brand’s reach and introduces you to new audiences.
Merchandise
Sell your brand patches as standalone merchandise or add them to other products (e.g., hoodies, backpacks, hats). This creates an additional revenue stream and lets customers represent your brand.

Common Brand Patch Design Mistakes to Avoid
Even the best brands make mistakes when designing custom embroidered patches. Here are the most common pitfalls to avoid:
-
Overcomplicating the Design: Too many details, colors, or text can make your patch look cluttered and hard to recognize. Stick to your logo and key brand elements.
-
Ignoring Color Consistency: Using colors that don’t match your brand’s palette can confuse your audience and dilute your brand identity. Always use Pantone color matching.
-
Choosing the Wrong Style: A luxury brand using 3D puff embroidery (which is bold and casual) can feel inconsistent. Choose a style that aligns with your brand’s personality.
-
Skimping on Quality: Low-quality patches with loose threads or faded colors reflect poorly on your brand. Invest in premium materials and a reputable supplier.
Final Thoughts on Brand Custom Embroidered Patches
Designing the perfect custom embroidered patch for your brand is all about alignment—aligning the design with your brand identity, the style with your brand personality, and the use case with your marketing goals. Custom embroidered patches are more than just accessories—they’re powerful branding tools that build recognition, foster loyalty, and extend your brand’s reach.
By following the steps in this guide—adapting your logo, sticking to your brand colors, choosing the right style and materials, and integrating patches into your marketing strategy—you can create patches that perfectly represent your brand and leave a lasting impression. Remember, the key is to work with a reputable supplier that understands branding and offers free mockups, quality guarantees, and endless customization options.
Ready to design your brand’s custom embroidered patches? Head to custom embroidered patches collections to start designing. With the right design and supplier, your patches will become a beloved part of your brand’s identity.
FAQ (Frequently Asked Questions)
Q: How do I ensure my brand logo translates well to embroidery? A: Work with your supplier’s design team to simplify intricate details, use high-quality vector files, and preserve key brand elements. Ask for a free mockup to test how your logo looks in embroidery—most custom patches suppliers offer unlimited revisions.
Q: What’s the best size for a brand custom embroidered patch? A: It depends on where you’ll use the patch: 2-3 inches for hats, 3-4 inches for jackets/uniforms, and 3-5 inches for promotional items. Choose a size that’s visible but not overwhelming.
Q: Can I order brand patches in bulk? A: Yes! Most suppliers offer bulk ordering options with volume discounts, perfect for employee apparel, promotional campaigns, or merchandise. The minimum order quantity (MOQ) is usually 10 pieces, but bulk orders (100+ pieces) get better pricing.
Q: How long does it take to produce brand custom embroidered patches? A: Standard production takes 5-10 business days, plus 3-5 business days for global shipping. You’ll receive a mockup within 24 hours of submitting your design, so plan ahead to ensure your patches arrive when you need them.
Q: Can I add my brand tagline to the patch? A: Yes! Just keep the text at least 0.25 inches tall to ensure it’s legible in embroidery. Your supplier’s design team can help you choose the right font and size to match your brand.
Tags:
Previous
Custom Embroidered Patches: A Complete Guide to Materials, Craftsmanship & Uses
Next
Bulk Custom Embroidered Patches Guide: Wholesale Order Tips & Benefits