Custom 3D Embroidered Patches‑Behind‑the‑Scene Manufacturing at Our Patch Factory
When customers order custom 3D embroidered patches, many people wonder exactly how their flat‑designed logo turns into a raised, textured three‑dimensional badge. Every high‑quality foam patch goes through a strict multi‑step manufacturing workflow inside our professional embroidery factory. Each stage requires careful craftsmanship, precise machine settings and thorough quality checks to guarantee durable, eye‑catching finished products for brands, clubs, businesses and organizations all across the United States.
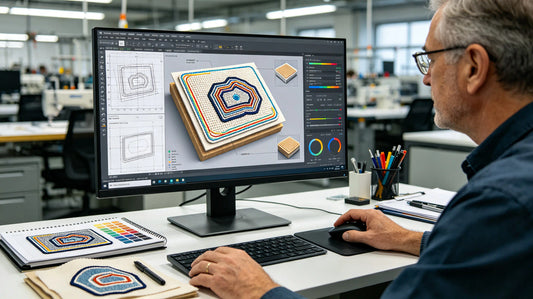
The whole production process begins long before fabric touches the embroidery machine. Our graphic technicians first convert your artwork into a professional embroidery digitized file. Digitizing sets stitch directions, thread colors, stitch density and marks out which sections of your badge will receive the 3D foam backing. Poor digitizing will ruin the final raised effect, so our experienced team reviews every design file and makes adjustments before sending files onto the production floor. This pre‑production stage is one of the most overlooked yet critical parts of 3D patch manufacturing.
Once digitizing approval is complete, fabric material is loaded onto industrial multi‑needle embroidery machines. High‑speed equipment sews dense embroidery threads over the top layer of fabric. For 3D patches, workers place soft foam material underneath the embroidery area before the final stitching locks foam securely in‑place. Thread wraps around the foam layer, creating that famous rounded, puffy three‑dimensional surface that separates foam patches from ordinary flat embroidered badges. Operators closely monitor running machines, fixing thread breaks and checking stitch quality throughout the embroidery run.
Right after embroidery finishes, newly‑sewn patch sheets move to the cutting station. Workers use precision laser cutters or sharp die‑cut tools to trim each individual badge out from the large fabric sheet. Clean, smooth edges are essential, and every cut badge goes through an initial visual screening. Patches with loose threads, uneven foam height or color defects get removed immediately and sent for rework before moving further down the assembly line.
Next comes backing installation, one of the final production steps. Depending on client requirements, factory workers apply iron‑on heat seal, hook‑and‑loop velcro, or strong‑adhesive peel‑and‑stick backing to the reverse side of each 3D embroidered badge. Heat‑press machines apply steady temperature and pressure to bond backing firmly without damaging the raised foam embroidery texture on the front. Heat settings must be carefully controlled; excessive heat can melt foam and destroy your 3D effect.
Before shipment, every batch of 3D embroidered patches passes our final‑stage quality inspection. Quality‑control staff check thread colors, foam height, border neatness, backing adhesion and overall durability. Approved badges are neatly stacked and packed into sealed bags and shipping boxes, ready to be delivered to customers throughout the USA. Our factory‑direct workflow cuts out middlemen, delivering premium custom 3D patches with fast turnaround times.

Why Order Your 3D Embroidered Patches Directly From a Professional Factory
Working directly with a patch manufacturing factory brings many advantages over third‑party resellers. Our in‑house production team can tweak foam thickness, stitch density, thread shades and backing options to perfectly match your vision for custom 3D badges. We accept both small‑batch orders and large bulk‑volume production runs. Every project receives hands‑on quality supervision from digitizing all the way to finished‑goods packaging.
Communication also becomes much simpler when your order is managed inside one facility. If you need design adjustments, sample revisions or production updates, our production team can respond quickly without waiting for replies from outside subcontractors. This streamlined workflow reduces delays and lowers the risk of miscommunication on custom patch orders.

Important Production Tips for 3D Foam Embroidered Badges
There are a few key design rules to keep in mind when creating artwork for three‑dimensional foam patches. Thick, bold shapes work best for 3D raised effects. Tiny, thin lines and extremely small text do not sit well on top of foam and can easily become distorted during embroidery. Our design team can suggest modifications if your original logo contains details that are not suitable for foam‑raised production.
Foam thickness is another customizable choice. Thin foam delivers a subtle low‑profile 3D look, while thicker foam creates a bold, highly raised badge. You can even choose partial 3D effects, where only selected logo sections are raised and other areas remain flat embroidery, creating layered visual contrast on one single patch.

Quality‑Control Standards Inside Our Patch Workshop
Our factory follows strict inspection checklists at every manufacturing phase. We check digitizing preview samples before full‑scale production begins. Mid‑run samples are pulled from embroidery machines to verify color matching and foam height. After die cutting, workers trim stray threads manually. The final inspection reviews every badge one last time. Any imperfect patches are discarded to ensure only premium‑grade 3D embroidered patches ship out to our clients.

Care Guidance for Finished 3D Embroidered Patches
Once you receive your finished custom 3D badges, protect their raised foam texture during application. If you are attaching iron‑on patches, avoid holding your iron directly against the embroidered front surface. Always place a thin protective cloth over the badge, and apply heat from the reverse side of your fabric garment. High, direct heat will melt compressed foam and flatten your 3D design. When cleaning items with embroidered patches, turn clothing inside‑out and wash on gentle cycles.

FAQ
Q: How long does factory production take for custom 3D embroidered patches?
A: Standard production turnaround ranges from 7‑14 business days after artwork approval. Rush manufacturing options can be arranged upon request.
Q: Can I order a physical sample before bulk production?
A: Yes, pre‑production samples are available so you can inspect foam thickness, thread colors and overall 3D effect before your full batch goes into manufacturing.
Q: Is partial 3D embroidery possible on one patch?
A: Absolutely, our factory can produce mixed‑style badges, with some sections raised with foam and other sections flat embroidered.
Q: What backing choices can I select for my finished 3D patches?
A: Iron‑on heat seal, hook and loop velcro, sew‑on plain fabric back, and self‑adhesive sticker backing are all available options.
Q: Can the factory make small‑quantity orders of custom 3D embroidered patches?
A: Our facility supports both low minimum small‑batch orders and large wholesale bulk production for businesses and organizations.
Tags:
Previous
Custom 3D Embroidered Patches for Kayak & River Paddling Communities
Next
Custom 3D Embroidered Patches for School Clubs & Student Organizations