Custom Patch Quality Inspection Guide | Standards, Checking Items, Defect Judgement & Acceptance Rules
Whether it is small-batch customized samples or large-scale bulk orders, strict quality inspection is indispensable. Many post-order disputes stem from unclear acceptance standards and missed defects during inspection. Different patch crafts have differentiated quality requirements for appearance, stitches, color and accessories. Mastering unified inspection standards and checking steps can help you quickly distinguish qualified and defective products, control order quality from the source, and ensure patches meet expected usage and display effects.
Custom 3D embroidered patches implements strict multi-level quality inspection before delivery, follows industry standards for size, color and craftsmanship, and provides professional acceptance guidance for all customers.

Part 1: Pre-Inspection Preparation Work
1. Prepare Reference Materials
Keep pre-production confirmed samples, design drafts, color cards and order specifications on hand. All bulk goods must be compared against the approved sample.
2. Inspection Tools
Steel ruler (for size measurement), magnifying glass (for fine stitch check), white cloth (for color fastness test), tweezers (for trimming loose threads).
3. Environment Requirement
Inspect under sufficient natural light or standard white light, avoid dim light or colored light causing color misjudgment.
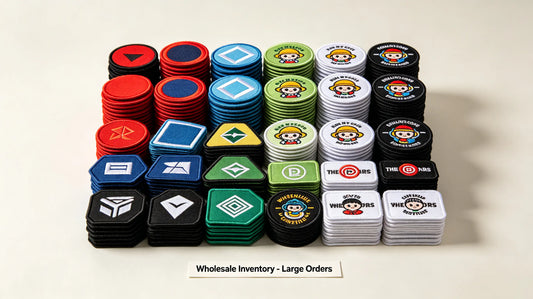
4. Sampling Rule for Bulk Orders
- Orders ≤ 100 pcs: 100% full inspection
- 101–500 pcs: Random sampling 20%
- >500 pcs: Random sampling 10%; if defects found, expand sampling range immediately
Part 2: Universal Inspection Standards (All Patch Crafts)
1. Size & Dimension Tolerance
- Standard tolerance: ±0.5mm for small patches (<3"); ±1mm for large patches (≥3")
- Check points: Overall length, width, irregular outline radian, edge symmetry
- Defect judgement: Exceed tolerance range → unqualified
2. Color Consistency
- Requirement: Bulk goods keep consistent with sample and color card, no obvious color difference between individual patches
- Check method: Place finished product and sample side by side for visual comparison
- Key points: Main color, auxiliary color, metallic thread color all need to match
3. Overall Appearance
- Surface: No stains, ink marks, oil spots, dust and foreign attachments
- Outline: Complete shape, no missing corners, deformation or warping
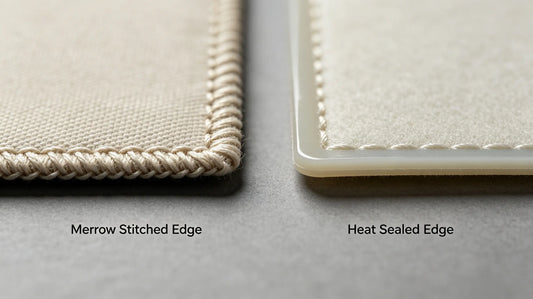
- Edges: Neat trimming, no burrs, rough cuts or uneven edges
4. Quantity & Packaging
- Count the total quantity to match order quantity
- Packaging: Tidy classification, no extrusion damage, sealed package intact

Part 3: Craft-Specific Inspection Standards
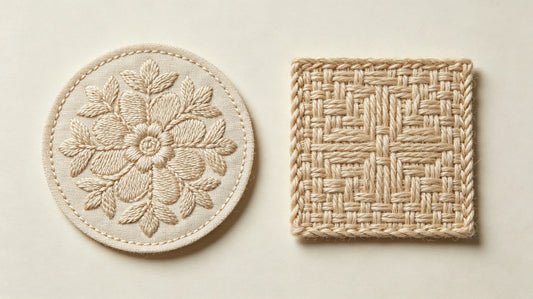
1. Flat Embroidered Patches
- Stitches: Dense and even, no missing stitches, jump stitches or uneven stitch density
- Thread: No broken threads, floating threads or messy thread ends on front and back
- Pattern: Clear outline, complete details, no pattern distortion or offset
- Merrow Edge: Winding thread even, firm edge, no off-line or loose coil
2. Woven Patches
- Weaving Texture: Tight and uniform weave, no sparse holes or broken lines
- Fine Details: Tiny text and lines keep clear, no blurring or fusion
- Edge Treatment: Smooth cutting, no fraying or loose woven yarns
- Layer: No layered separation of base fabric and woven surface
3. 3D Foam Embroidered Patches
- Stereo Effect: Foam height uniform, no partial collapse or uneven protrusion
- Thread Coverage: Raised area fully covered by threads, no exposed foam
- Firmness: Press gently, no abnormal noise or loose structure
- Transition: Natural transition between 3D area and flat area, no obvious gaps
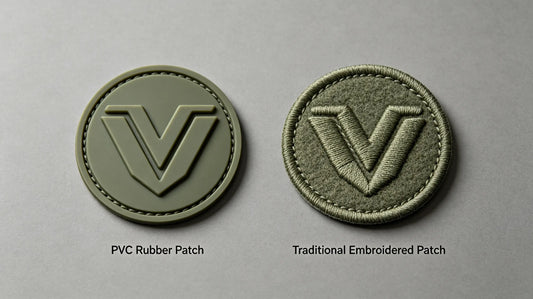
4. PVC Rubber Patches
- Surface: Smooth texture, no bubbles, dents, scratches or mold marks
- Shape: Complete outline, no deformation, burrs or overflow rubber
- Concave & Convex: Uniform depth of grooves, no adhesion between layers
- Hardness: Moderate texture, no brittle cracking when slightly bent
Part 4: Backing Performance Inspection
1. Sew-On Backing
- Base fabric intact, no damage or holes
- Firm bonding between backing and surface layer, no delamination
2. Iron-On Hot Melt Backing
- Glue layer complete, no missing glue, peeling or uneven coating
- Tear gently, glue does not separate from patch base
3. Velcro (Hook & Loop) Backing
- Hook side: Complete plastic hooks, no large-area missing hooks
- Loop side: Dense loops, no sparse areas
- Adhesion test: Press two sides together then peel off, normal pulling force, no easy separation
4. Self-Adhesive Backing
- Protective film complete, glue no dry failure
- After tearing off film, good viscosity, no residue failure

Part 5: Color Fastness & Wear Resistance Simple Test
- Rub the patch surface back and forth with a clean white dry cloth for 20 times, no obvious color fading and staining.
- Slightly pull edges and corners, no thread shedding, edge cracking or material separation.
- For daily use scenarios: Simulate slight friction to ensure stable structure.
Part 6: Classification of Common Defects & Processing Suggestions
Level 1: Critical Defects (Reject Directly)
- Serious color deviation, size far beyond tolerance
- Pattern missing, large area missing stitches, patch deformation
- Backing complete failure, unable to use normally
- Stains and damage affecting overall appearance
Level 2: Major Defects (Batch Rework Required)
- Partial loose threads, local blurry patterns
- Individual edge burrs, minor warping
- Slight color difference between single products in bulk
Level 3: Minor Defects (Acceptable After Simple Trimming)
- Individual floating thread ends, tiny redundant burrs
- Inconspicuous small spots that do not affect use

Part 7: Formal Acceptance & Record Rules
- Complete inspection first before signing acceptance document; do not sign in advance.
- Take photos and record all defective products, mark defect locations and quantities.
- For unqualified batches, communicate with supplier clearly about rework, replacement or refund solutions.
- Keep samples, inspection photos and communication records for after-sales proof.
- For large long-term orders, retain a qualified sample for subsequent reorder reference.
Part 8: Common Inspection Mistakes To Avoid
- Only check appearance while ignoring size measurement → size error leads to installation failure
- Skip color comparison with standard sample → color difference affects brand and style
- Ignore backing inspection → patches peel off easily after use
- Only inspect a small number of samples for large orders → a large number of hidden defective goods remain
- Accept goods under poor light → misjudge color and minor defects

Final Summary Core Rule
Take pre-production sample as the unified standard, check size, color, appearance first for all patches; inspect stitches, texture and stereo effect according to different crafts, and test backing firmness additionally. Classify defects by severity, follow sampling rules for bulk orders, keep inspection records. Strict acceptance effectively avoids quality problems and after-sales disputes.
Frequently Asked Questions
Q1: What is the allowable size error for custom patches?
A: Within ±0.5mm for patches smaller than 3 inches, ±1mm for larger ones.
Q2: What to do if a small number of patches have loose thread ends?
A: Trim excess threads gently with tweezers, it belongs to minor defect.
Q3: How to check if 3D foam patches are qualified?
A: Check uniform height, full thread coverage and no collapse when pressed.
Q4: Is color fading during inspection a qualified problem?
A: Obvious color fading is critical defect, reject directly and ask for replacement.
Tags:
Previous
Custom Patch Motorcycle & Biker Guide | Biker Style, Club Logos, Positioning & Durability Tips
Next
Custom Patch Washing & Care Guide | Washing Methods, Color Fading Prevention & Long-Term Care