Custom Patch Sizing Guide 2026 | Standard Sizes, Design Ratio & Best Fit
Most custom patch design failures are not caused by poor artwork — they happen because of wrong patch sizing. A patch that is too small loses text clarity and detail; a patch that is too large looks bulky, awkward, and unbalanced on your gear.
Understanding standard custom patch sizes, visual scaling rules, and item‑specific sizing ranges is essential for professional, clean, and eye‑catching results. Whether you are ordering small hat patches, medium sleeve patches, or large back patches for jackets, this complete sizing guide will help you avoid common mistakes and perfectly size your next batch of custom embroidered patches.

1. Why Patch Size Matters For Quality & Readability
Size directly controls two critical factors of your finished patch: detail clarity and visual proportion.
If your patch is undersized: Tiny text blurs, thin lines merge, logos lose definition, and the patch looks messy and unfinished. If your patch is oversized: The patch dominates the garment, creates stiff bulky fabric sections, wrinkles easily, and ruins the natural silhouette of hats, sleeves, and uniforms.
Professional patch sizing ensures your design remains sharp, readable, and aesthetically balanced on every application surface.
2. Industry Standard Custom Patch Sizes (Universal Chart)
These are the most commonly ordered, production‑optimized standard sizes for all custom patches (embroidered, woven, PVC, leather):
Mini Patches (1.5″ – 2″)
Best for: Hat side panels, collar badges, zipper pulls, small logo accents Features: Minimal detail only, bold simple shapes recommended, no small text
Small Patches (2″ – 2.5″)
Best for: Tactical morale patches, chest logos, sleeve mini accents, brand icons Features: Standard everyday patch size, supports short text and basic logos
Medium Patches (3″ – 3.5″)
Best for: Uniform chest patches, hat front logos, standard sleeve identifiers Features: Most popular all‑around size, balances detail and wearability
Large Patches (4″ – 5″)
Best for: Jacket sleeves, backpack fronts, team insignias Features: Full design space, supports multi‑element logos and readable text
XL Back Patches (6″ – 12″)
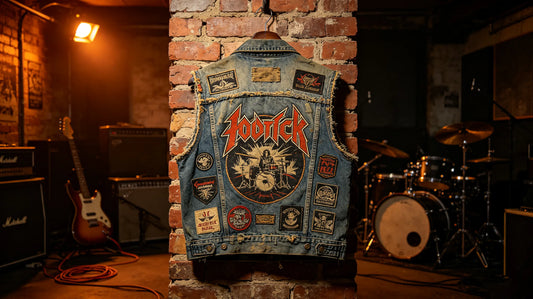
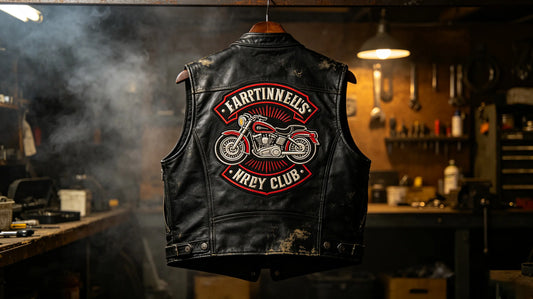
Best for: Full jacket back patches, biker vest back pieces, large mascot designs Features: Maximum design space, full artwork display, perfect for complex graphics

3. Perfect Patch Sizes By Item (Complete Application Guide)
Hats & Caps
- Front panel main logo: 2.25″ – 3″
- Side panel mini patch: 1.5″ – 2″
- Back hat loop patch: 2″ – 2.5″ Rule: Never exceed 3″ on hat fronts — oversized patches will warp hat foam and look cramped.
Jackets & Vests
- Left/Right Chest patch: 3″ – 3.5″
- Sleeve arm patch: 4″ – 4.5″
- Full back large patch: 7″ – 10″ (standard adult jacket) Rule: Back patches should leave 1–2 inches of empty fabric border for balanced styling.
Backpacks & Bags
- Small bag accent: 2.5″ – 3″
- Main backpack logo: 3.5″ – 4.5″ Rule: Bags allow slightly larger patches than clothing, no fabric stretching issues.
Work & Staff Uniforms
- Corporate uniform chest patch: 2.5″ – 3″
- Security/Staff sleeve patch: 3.5″ – 4″ Rule: Uniform patches must stay compact and professional — avoid oversized graphics.
Tactical & Morale Patches
- Standard morale patch: 2″ x 3″ rectangle / 3″ circle
- Tactical identifier patch: 3″ – 3.5″ Rule: Standard loop panel gear is sized for 2–3.5 inch patches.
4. Critical Size & Design Ratio Rules (Must Follow)
Text Minimum Size Rule
- Embroidered patches: No text smaller than 6mm / 0.25″
- Woven patches: No text smaller than 4mm / 0.16″
- PVC patches: No text smaller than 1.5mm Text below these sizes will blur, merge, or become unreadable after production.
Shape Ratio Rule
- Rectangular patches: Stick to 2:3 or 3:4 ratio for natural balanced looks
- Circular patches: Perfect circles look cleaner than stretched oval shapes
- Shield/Irregular patches: Avoid extreme tall/thin or wide/flat distortion
Border Safety Rule
Always leave a 2mm clean border gap around your artwork edge. Full bleed designs without borders look uneven after cutting.

5. Small VS Large Patches: Pros & Cons
Small Patches (1.5″ – 2.5″)
Pros: Lightweight, low profile, versatile for hats/collars, affordable bulk pricing Cons: Cannot fit detailed logos or long paragraphs of text
Medium Patches (3″ – 3.5″)
Pros: Best balance of detail, style, and affordability, universally wearable Cons: None — this is the ideal default size for most custom orders
Large & XL Patches (4.5″ – 12″)
Pros: Highly visible, full artwork display, premium bold appearance Cons: Heavier fabric feel, higher cost, limited garment compatibility
6. Size Restrictions For Different Patch Materials
Embroidered Patches
- Best detail range: 2.5″ and up
- Avoid tiny complex logos under 2″
Woven Patches
- Best for ultra‑fine text even at small sizes
- Most precise for 1.5″ – 3″ detailed logos
PVC Rubber Patches
- Minimum sturdy size: 2″
- Thin tiny shapes under 1.5″ risk breaking
Leather Patches
- Ideal hat size: 2.25″ – 3″
- Oversized leather patches feel heavy and stiff on fabric

7. Pro Tips To Order The Perfect Sized Patches Every Time
- Always measure your garment blank first before choosing patch dimensions.
- If your design has text, size up slightly to guarantee readability.
- For mixed orders (hats + jackets), order two different sizes instead of one universal size.
- Avoid maxing out patch size to the edge of your garment — negative space improves aesthetics.
- When unsure, choose the medium standard 3″ size — it works for 90% of custom projects.
Final Thoughts
Custom patch sizing is one of the most overlooked yet impactful parts of patch design. A perfectly sized patch enhances your brand, uniform, or apparel, while incorrect sizing can ruin even the best artwork.
Use the item‑specific size ranges above to match your patches to hats, jackets, uniforms, and gear. Always prioritize text readability and visual balance over oversized graphics. With correct sizing, your custom embroidered patches will look clean, professional, and premium every single time.

FAQ
Q: What is the most popular custom patch size?
A: The 3‑inch medium patch is the most popular and versatile size for hats, chest logos, and general apparel customization.
Q: What size patch fits best on hat fronts?
A: 2.25 inches to 3 inches is the perfect range for standard baseball caps and trucker hats.
Q: Can small patches have readable text?
A: Only simple, large font text works on small patches. Tiny fonts will blur on embroidered patches under 2.5 inches.
Q: What size should jacket back patches be?
A: Standard adult jacket back patches range from 7 inches to 10 inches for a balanced, professional look.
Q: Do larger patches cost more?
A: Yes, patch pricing scales with size. Larger patches require more thread, material, and production time.
Tags:
Previous
Sew On Patches Guide 2026 | Durability, Stitching Tips & Best Uses
Next
Custom Patch Border Guide 2026 | Merrow Border Vs Heat Cut Border