Iron‑On vs Sew‑On Patches 2026 | Which Attachment Method Is Right For You
One of the most important decisions when ordering custom patches is picking your preferred backing. Iron‑on heat‑seal backing and sew‑on backing are the two most popular options, yet they deliver completely different results in terms of installation speed, strength, and long‑term wash resistance.
Many customers mistakenly believe iron‑on patches are a fully permanent solution. In reality, heat‑activated glue will slowly break down with repeated washing, and patch edges can start lifting over time. Sew‑on patches, by contrast, create a mechanical bond between patch and fabric that can last for many years of heavy‑duty use.
This side‑by‑side comparison guide breaks down every key factor so you can confidently choose the best attachment method for your jacket, backpack, uniform, hat, or casual merchandise project.

1. What Are Iron‑On (Heat Seal) Patches
Iron‑on patches come with a thin layer of heat‑activated glue coated on their rear side. When heat and pressure are applied with a household iron or heat press, the adhesive melts, flows into the fabric fibers, and hardens as it cools to stick the patch firmly onto clothing.
Benefits of Iron‑On Patches
- No sewing equipment, thread, or needle required for quick installation
- Application takes less than five minutes
- Easy for beginners with zero craft experience
- No visible stitching around the patch border if you prefer a clean‑looking finish
- You can always sew them later as reinforcement
Downsides of Iron‑On Patches
- Not fully permanent. Average lifespan ranges from 20‑30 wash cycles before edges lift
- High‑heat tumble drying will dramatically speed‑up peeling
- Will not stick well to nylon, waterproof coated fabrics, or thick silicone‑treated materials
- Adhesive bond can fail if you apply insufficient heat or pressure during installation
- Dry‑cleaning chemicals dissolve the heat‑seal glue completely
2. What Are Sew‑On Patches
Sew‑on patches have no adhesive layer on the back. You attach them permanently by stitching around their outer border using either a hand‑sewing needle or home sewing machine.
Benefits of Sew‑On Patches
- The most permanent attachment available for fabric‑based garments
- Unlimited washing cycles with almost zero risk of falling off
- Works on every fabric type, including canvas, denim, nylon jackets, and waterproof backpack material
- Stitching can add an extra decorative outline effect around your patch
- Zero risk of bond failure caused by laundry heat or harsh detergents
Downsides of Sew‑On Patches
- Installation takes longer and requires basic sewing supplies
- Hand‑sewing can be slow for beginners
- Visible thread will run around the outer edge of your patch unless you use perfectly matched thread color
- Sewing through thick leather or heavy coated fabric can be difficult

3. Head‑to‑Head Comparison Table
| Factor | Iron‑On Heat Seal | Sew‑On Backing |
|---|---|---|
| Installation Time | 3‑5 minutes | 10‑30 minutes |
| Permanent Durability | Temporary, limited wash life | Permanent, multi‑year durability |
| Laundry Resistance | Moderate, risk of peeling | Excellent, very low failure risk |
| Tools Required | Household iron or heat press | Needle, thread, scissors or sewing machine |
| Works on Waterproof Fabrics | No | Yes |
| Visible Border Finish | Stitch‑free clean look | Visible thread stitching |
| Best for Low‑use Items | ✅ Great fit | Overkill but reliable |
| Best for Daily‑worn Uniforms | ❌ Not recommended | ✅ Excellent choice |
4. Ideal Projects for Iron‑On Patches
Iron‑on backing is perfectly suited for items that will not go through heavy, repeated laundry cycles. Choose iron‑on if your project matches any of these examples:
- Light‑use decorative jackets worn occasionally
- Display patches for wall decor, craft projects, and fabric art
- One‑event clothing, festival outfits, short‑term costumes
- Beginner DIY projects where sewing is not an option
- Backpacks that are rarely washed
Pro tip: If you love the convenience of iron‑on but want improved durability, sew around the edges after heat‑pressing the patch into place. This hybrid method delivers fast application plus permanent security.

5. Ideal Projects for Sew‑On Patches
Sew‑on backing is the safest selection for anything that will see heavy daily wear and frequent washing. Select sew‑on for:
- Work uniforms, school uniforms, and public service apparel
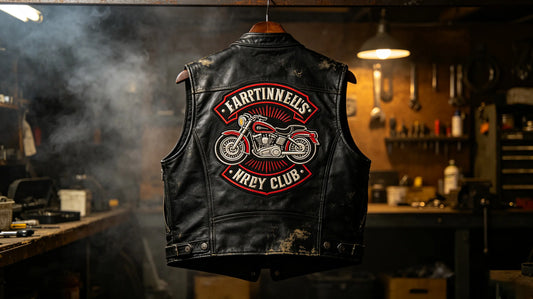
- Motorcycle club vests and riding jackets worn year‑round
- Hiking packs, outdoor gear, and heavy‑use backpacks
- Kids’ clothing which gets laundered very often
- Heirloom patches you want to keep intact for many years
6. Step‑By‑Step Iron‑On Application Checklist
For the strongest possible iron‑on bond, follow these instructions:
- Lay your garment on a hard, heat‑resistant flat surface. Avoid soft beds or couches.
- Pre‑iron the clothing fabric to remove wrinkles and moisture.
- Peel off any protective plastic sheet covering the glue on the patch back.
- Position your patch face‑up on your desired location.
- Place a thin cotton cloth over the patch to protect embroidery or rubber from direct iron heat.
- Set your iron to cotton high heat, turn off steam.
- Press firmly, hold 30‑45 seconds on every section of the patch.
- Flip the garment over, iron the reverse side for another 30 seconds.
- Let everything cool completely before testing adhesion.

7. Simple Sew‑On Tips for Beginners
If you are new to sewing patches, use these easy recommendations:
- Choose thread color that matches your patch border for nearly invisible stitching
- Use a simple running stitch or whip‑stitch around the outer merrow edge
- Tie secure knots at the start and finish to prevent loose threads
- A sewing machine will finish square‑shaped patches much faster than hand‑sewing
Final Thoughts
Iron‑on and sew‑on backings each serve very different purposes. Iron‑on patches offer quick, no‑sew convenience for short‑term and low‑wear projects, while sew‑on patches deliver rock‑solid, long‑lasting permanence for uniforms, outdoor gear, and daily‑worn apparel.
If you cannot decide between the two, ordering iron‑on patches and then adding stitching reinforcement is a great middle‑ground solution that gives you both speed and durability. By matching your backing choice to how often your item will be washed and worn, you can avoid peeling patches and enjoy your custom badges for as long as possible.

FAQ
Q: How long will iron‑on patches stay attached?
A: Typically 20‑30 gentle wash cycles. Hot dryers will shorten this lifespan significantly.
Q: Can I sew a patch that already has iron‑on backing?
A: Yes, sewing over iron‑on patches is completely safe and highly recommended for improved durability.
Q: Why did my iron‑on patch fall off after one wash?
A: Common causes include insufficient heat or pressure during application, steam from the iron, or application onto waterproof coated fabric.
Q: Are sew‑on patches better than iron‑on patches?
A: Sew‑on is more durable, but iron‑on is more convenient. The best option depends on your intended use and laundry frequency.
Q: Can iron‑on patches stick to nylon?
A: Usually not. High heat required for iron‑on glue can melt nylon fabric, and adhesive does not bond reliably to slippery synthetic coatings.
Tags:
Previous
Custom Patch Washing & Care Guide 2026 | Keep Patches From Fading & Peeling
Next
Hook and Loop Patches 2026 | The Complete Removable Morale Patch Guide