DIY Custom Patches: Easy Application Tips & Daily Outfit Ideas to Elevate Your Style
DIY custom patches are the ultimate way to add a personal touch to your wardrobe without spending a fortune on new clothes. Whether you’re a craft enthusiast looking to tackle a simple project or someone who wants to refresh old garments, custom embroidered patches are easy to work with and endlessly versatile. From iron-on shortcuts to durable sew-on methods, we’re breaking down everything you need to know about applying custom patches at home, plus stylish outfit ideas that work for every casual occasion. Best of all, you can find all the high-quality patches you need for your DIY projects from trusted suppliers.

Why DIY Custom Patches Are Perfect for Every Wardrobe
Custom patches aren’t just for crafters—they’re for anyone who wants to make their clothes and gear feel unique. DIY application is simple, even for beginners, and it lets you update old items instead of throwing them away (a win for both your wallet and the planet). Whether you’re fixing a small tear, adding personality to a plain t-shirt, or customizing a gift for a friend, custom patches make it easy to infuse your style into every piece. They’re also flexible: you can switch patches out as your style changes, making your wardrobe more adaptable and fun.
Unlike expensive custom clothing, DIY custom patches let you experiment without commitment. You can mix and match designs, try different application methods, and create looks that are 100% you. Plus, with the right patches and a few simple tools, you can complete most projects in under 30 minutes—perfect for busy schedules.

Easy DIY Custom Patches Application Tips (For Beginners & Pros)
Applying custom patches doesn’t require advanced crafting skills—you just need the right method for your garment and a little patience. Below, we’re sharing the most common application methods, step-by-step tips, and tricks to ensure your patches stay in place for years.
Iron-On Custom Patches: Quick & Easy for Beginners
Iron-on patches are the best choice for anyone new to DIY, as they require no sewing and take just a few minutes to apply. Start by preheating your iron to the cotton setting (no steam!) and laying your garment flat on an ironing board. Place the patch face-up on the area you want to decorate, then cover it with a thin cloth (to protect the patch and garment from heat). Press the iron firmly on the patch for 15-20 seconds, then flip the garment inside out and press again for another 10 seconds. Let it cool completely before wearing—simple as that!
For best results, choose high-quality iron-on custom patches with strong adhesive backing. Avoid using iron-on patches on delicate fabrics like silk or lace, and always check the garment’s care label before applying heat. If you want extra durability, you can add a few stitches around the edges of the patch (optional, but recommended for items you wear often).
Sew-On Custom Patches: Durable & Long-Lasting
Sew-on patches are ideal for heavy-duty items like jackets, backpacks, and jeans—they’re more durable than iron-on patches and can withstand frequent washes and wear. You’ll need a needle, thread (matching the patch or garment color), and a pair of scissors. Start by placing the patch on the garment and securing it with a few pins to keep it in place. Thread your needle, then use a simple straight stitch around the edges of the patch, keeping the stitches small and even. Tie a knot on the back of the garment when you’re done, and trim any excess thread.
If you’re new to sewing, don’t worry—sew-on patches are forgiving, and even uneven stitches will add a charming, handmade touch. For a more polished look, use a sewing machine (set to a straight stitch) to attach the patch. You can find a wide variety of durable sew-on custom patches in different styles, from simple designs to intricate embroidered patterns.
Adhesive Custom Patches: Temporary & Versatile
Adhesive patches are perfect for items you don’t want to permanently modify, like rental clothing, hats, or leather accessories. They’re easy to apply—just peel off the backing and stick the patch to a clean, dry surface. While they’re not as durable as iron-on or sew-on patches, they’re great for temporary styling, events, or testing out a design before committing.
For best results, choose adhesive custom patches designed for the material of your item (e.g., leather-specific adhesive for jackets). Avoid applying adhesive patches to fabrics that are prone to fraying, and keep them away from water to extend their lifespan.

DIY Custom Patches: Daily Outfit Ideas to Try
Once you’ve mastered applying custom patches, it’s time to style them! Below are easy, everyday outfit ideas that work for any casual occasion—from running errands to hanging out with friends. These looks are simple to recreate and let your patches take center stage.
Plain T-Shirt + Small Custom Patches
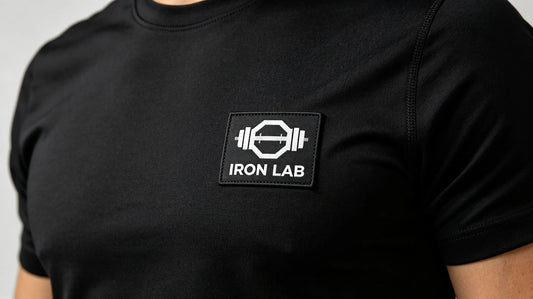
A plain white or black t-shirt is the perfect canvas for small custom patches. Add 1-2 tiny patches (like a minimalist logo, a small flower, or a funny quote) to the chest or sleeve for a subtle pop of personality. Pair the t-shirt with jeans and sneakers for a casual, effortless look that’s perfect for weekend outings. You can find cute, small custom patches that fit this style perfectly.
Denim Jacket + Patch Collage
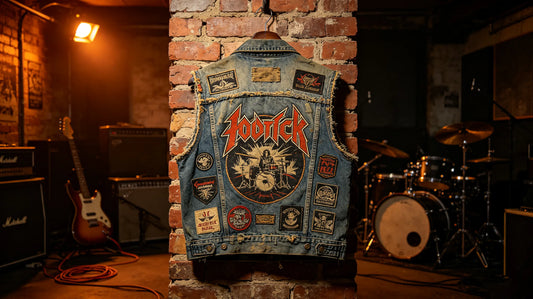
Denim jackets are a classic canvas for custom patches, and a collage of patches adds a fun, retro vibe. Mix and match different sizes and designs—try a large patch on the back, and smaller patches on the sleeves or front pockets. Stick to a theme (like outdoor adventures, music, or quotes) or mix styles for a more eclectic look. Pair the jacket with a plain dress or a t-shirt and shorts for a versatile outfit that works year-round.
Backpack + Themed Patches
Custom patches aren’t just for clothing—they’re a great way to personalize your backpack. Add patches that reflect your hobbies (like hiking, reading, or photography) or travel memories to the front or straps of your backpack. It’s a simple way to make your bag stand out from the crowd and show off your personality. Plus, custom patches are durable enough to withstand the wear and tear of daily use.
Jeans + Knee Patches
Turn old, worn jeans into a stylish statement by adding custom patches to the knees. This is a great way to cover small tears or holes while adding personality. Choose fun, bold patches (like animal prints, geometric designs, or slogans) and apply them to the knees using the iron-on or sew-on method. Pair the jeans with a hoodie and sneakers for a casual, edgy look.

Common DIY Custom Patches Mistakes to Avoid
Even with the best tips, it’s easy to make small mistakes when applying custom patches. Here are a few common pitfalls to avoid to ensure your DIY projects look polished and last:
-
Skipping preheating: For iron-on patches, preheating the garment and using the right temperature is key—too much heat can damage the fabric, while too little won’t activate the adhesive.
-
Not securing the patch: For sew-on patches, make sure to pin the patch in place before sewing to avoid it shifting.
-
Overcrowding: Too many patches on one garment can look cluttered—stick to 1-3 patches per item for a clean, intentional look.
-
Choosing the wrong patch for the fabric: Always match the patch’s attachment method to the fabric (e.g., avoid iron-on patches on delicate materials).
The good news is that most mistakes are easy to fix—if an iron-on patch doesn’t stick, simply reapply heat. If you sew a patch crookedly, you can unpick the stitches and try again. And for the best results, start with high-quality custom patches that are designed for DIY application.

Final Thoughts on DIY Custom Patches
DIY custom patches are a fun, affordable way to personalize your wardrobe and gear. Whether you’re a beginner or a seasoned crafter, applying patches is simple, and the possibilities for styling are endless. With the right application tips and high-quality patches, you can turn ordinary items into unique pieces that reflect your personality.
Ready to start your DIY custom patches project? Head to custom embroidered patches collections to find the perfect designs for your next project. From iron-on to sew-on, there’s a patch for every style and skill level—start creating today and elevate your wardrobe with a personal touch.
FAQ (Frequently Asked Questions)
Q: Can I reuse iron-on custom patches? A: Unfortunately, iron-on patches are designed for one-time use—once the adhesive is activated by heat, it can’t be reactivated. For reusable patches, opt for adhesive or hook-and-loop custom patches.
Q: How do I wash clothes with custom patches? A: For iron-on and sew-on patches, wash the garment inside out on a gentle cycle with cold water. Avoid high-heat dryers—air drying is best to extend the life of the patch. Adhesive patches should be removed before washing.
Q: Do I need special tools to apply custom patches? A: For iron-on patches, you just need an iron and a thin cloth. For sew-on patches, you’ll need a needle, thread, and pins. No special tools are required—most items you already have at home will work.
Q: Can I customize my own DIY custom patches? A: Yes! Many suppliers let you upload your own design to create custom patches for your DIY projects. Whether you want a personal logo, a photo, or a unique design, you can find custom patches that are tailored to your vision.
Tags:
Previous
Custom Patches for Every Lifestyle – Elevate Your Outfits & Gear with Personalized Flair
Next
Custom Patches Materials Guide: Choose the Best Fabric for Your Style & Needs