Custom Patch Size Placement Guide | Perfect Position for Chest, Sleeve, Hat, Backpack & Vest
A perfectly designed custom patch can still look unpolished and unprofessional if placed incorrectly. Offset centering, wrong height positioning, oversized patches on small areas and cramped layout are common visual mistakes that destroy garment aesthetics. Professional apparel, team uniforms and tactical gear all follow fixed industry patch size and placement standards. Mastering these universal positioning rules ensures symmetrical, balanced, high-grade finished results for any custom patch application.
Custom 3D embroidered patches provides free size and placement consultation according to your garment type, ensuring every custom patch fits perfectly with standard positioning proportions.

Part 1: Universal Standard Patch Size & Placement For All Positions
1. Left Chest Patch (Most Common Uniform Position)
Ideal Size: 2.5″ – 3.5″
The mainstream standard for corporate uniforms, team polos, staff shirts and casual jackets.
Standard Placement Rule:
Position the patch centered on the left chest, 4–5 inches below the shoulder seam, horizontally aligned with the collar edge. Keep symmetrical distance from the button placket to avoid offset deviation.
Best usage: Brand logos, team emblems, company identity patches.
2. Sleeve Arm Patch (Long & Short Sleeve)
Ideal Size: 2″ – 3″
Sleeve space is limited; oversized patches will wrinkle and fold during arm movement.
Standard Placement Rule:
Place centered on the outer sleeve, 2–3 inches above the elbow joint. Avoid covering elbow bending area to prevent patch creasing and peeling after repeated movement.
Best usage: Flag patches, department marks, seasonal badges, rank insignia.

3. Front Hat Patch (Baseball Caps & Trucker Hats)
Ideal Size: 2″ – 2.75″
Hat front panel has strict size limits; overly large patches will warp the hat panel.
Standard Placement Rule:
Perfect horizontal and vertical center alignment on the front hat panel, leaving equal blank margins on four sides to maintain three-dimensional hat shape.
Best usage: Brand logos, team mascots, minimal custom icon patches.
4. Full Back Jacket / Vest Patch
Ideal Size: 6″ – 10″
Large back area allows high-impact visual display, the most eye-catching patch position.
Standard Placement Rule:
Center the patch precisely on the back torso, equal distance from left/right shoulder seams and upper/lower garment edges.
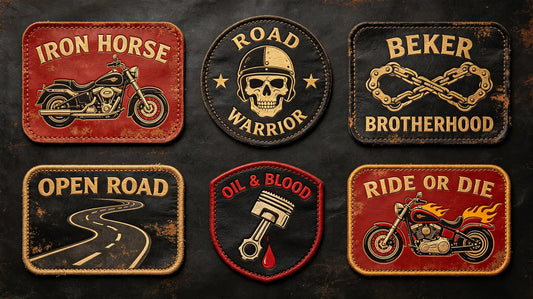
Best usage: Biker club logos, team slogans, large mascot patterns, event commemorative designs.
5. Backpack & Bag Patch Placement
Ideal Size: 3″ – 4.5″
Flexible size range, allowing personalized multi-patch combination layout.
Standard Placement Rule:
Single patch: center on main bag panel.
Multiple patches: maintain equal spacing and neat grid arrangement, avoid random scattered sticking.
Best usage: Morale patches, hobby themed collections, travel souvenir sets.

Part 2: Proportional Matching Rules For Different Garment Types
Slim-Fit Shirts
Choose smaller 2.5″–3″ chest patches to avoid protruding and cramped visual effect.
Loose Oversized Jackets
Support 3.5″–4″ larger chest patches to match spacious garment proportion.
Kids Uniforms
Strictly use 2″–2.5″ mini patches; standard adult sizes will look bulky and unbalanced.
Tactical Vests
Follow gear grid rule, align patch edges with Molle grid lines for neat tactical aesthetics.
Part 3: Multi-Patch Combination Layout Standards
- Dual chest + sleeve layout: Keep all patches unified in style, thickness and border specification
- Multiple sleeve badge arrangement: Arrange vertically with equal spacing, avoid overlapping and uneven gaps
- Back large patch + small chest logo: Match consistent color system to form unified brand visual system

Part 4: Most Common Patch Placement Mistakes To Avoid
- Oversized patches on hat front panel → deformed hat surface and wrinkled edges
- Too low chest patch placement → messy unprofessional uniform appearance
- Patches covering elbow bending area → frequent folding leading to peeling and thread damage
- Off-center back patch placement → serious visual imbalance and amateur effect
- Mixed inconsistent sizes for team uniform patches → disordered team visual identity
Part 5: Quick Selection Cheat Sheet
- Chest uniform → 2.5–3.5″ centered
- Sleeve badge → 2–3″ above elbow
- Hat front → 2–2.75″ fully centered
- Jacket back → 6–10″ large center layout
- Backpack decoration → 3–4.5″ flexible arrangement
Final Summary Core Rule
Small compact areas (hat/sleeve) = mini size patches; main chest area = standard golden size; back large area = oversized impact patches; keep center alignment and proportional spacing; avoid elbow and edge coverage; unify sizes for team uniforms.
Standard placement and sizing turn ordinary patches into professional-grade apparel decoration.
Frequently Asked Questions
Q1: What is the standard size for custom chest logo patches?
A: 2.5 to 3.5 inches is the universal standard size for most uniform chest patches.
Q2: Where should sleeve patches be placed?
A: 2–3 inches above the elbow, centered on the outer sleeve to avoid movement creasing.
Q3: What size patch fits best on hat front panels?
A: 2 to 2.75 inches ensures perfect fit without deforming the hat structure.
Q4: Why do my patched uniforms look unprofessional?
A: Most issues come from off-center placement, mismatched size or uneven multi-patch spacing.
Tags:
Previous
Custom Patch Designer vs AI Generated Patches | Which Creates Better Quality Custom Designs
Next
Custom Patch Velcro Backing Guide | Loop & Hook Type, Strength, Replacement & Tactical Usage