Custom Patch Sew-On Guide | Hand Sewing, Machine Sewing, Stitch Types & Professional Tips
Sew-on patches have no adhesive layer on the back, relying entirely on stitches to connect with fabrics. This method is universally applicable to all materials, crafts and usage scenarios, and stands out for durability, high temperature resistance and wash resistance. It is the top choice for work uniforms, outdoor gear, vintage clothing and long-term use items. Whether you choose slow and delicate hand sewing or efficient machine sewing, mastering standard techniques can avoid loose threads, uneven stitches and edge warping.
Custom 3D embroidered patches adopts thickened base fabric for sew-on style, matching various sewing methods, and maintains stable fixation even after long-term repeated washing and wearing.

Part 1: Advantages & Applicable Scenarios of Sew-On Patches
Core Advantages
- Extreme durability: Not affected by high temperature, water washing and friction, longest service life among all backing types.
- Wide compatibility: Works on silk, elastic fabric, waterproof cloth, thick denim and all special materials.
- Flat & elegant: Neat stitches do not affect the texture of clothes, suitable for formal and high-end apparel.
- Repairable: Loose stitches can be re-sewn easily without damaging patches or fabrics.
Recommended Usage Scenarios
- Work uniforms, safety clothing and long-term wearable apparel
- 3D foam patches, thick PVC patches and large-size patches
- Heat-sensitive fabrics and outdoor equipment that cannot use iron-on backing
- Collectible patches and vintage style clothing with high appearance requirements
Not Ideal Scenarios
- Temporary decoration requiring frequent replacement
- Ultra-thin delicate fabrics where dense stitches may leave pinholes
Part 2: Tools Preparation Before Sewing
- Needle: Common sewing needle for thin fabrics; thick heavy-duty needle for denim, canvas and thick patches.
- Thread: Match thread color with patch edge or main tone, use high-strength polyester thread for wear resistance.
- Scissors: Small embroidery scissors for trimming excess thread.
- Pins & Chalk: Use safety pins or tailor's chalk to fix position and mark outline.
- Thimble (Optional): Protect fingers when sewing thick multi-layer materials.

Part 3: Pre-Sewing Position Fixing Steps
- Lay the garment flat and smooth all wrinkles.
- Place the patch at the target position, adjust angle and alignment.
- Fix the four corners with safety pins to prevent shifting during sewing.
- For large and irregular patches, add extra pins on curved edges for reinforcement.
- Confirm the final position again before starting to sew.
Part 4: Hand Sewing Full Tutorial (For Small Batches & Fine Work)
1. Running Stitch (Basic Universal Stitch)
- Operation: Insert needle from fabric back to front, keep equal stitch spacing around the edge.
- Stitch distance: 3–5mm, uniform size for neat look.
- Features: Simple to operate, firm fixation, most widely used basic stitch.
- Applicable: All regular-shaped flat patches.
2. Whip Stitch (Edge Wrapping Stitch)
- Operation: Wrap the thread tightly along the patch edge, stitches stand vertically on the outline.
- Features: Fully covers the patch edge, anti-fraying, strong three-dimensional sense.
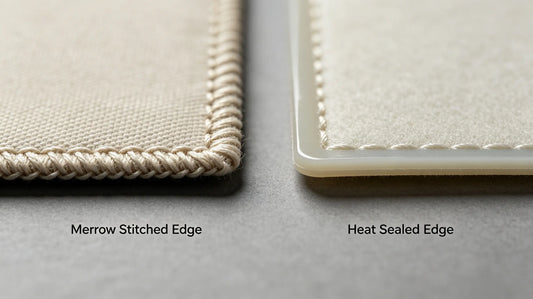
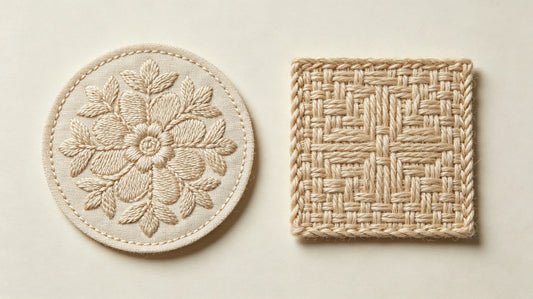
- Applicable: Merrow edge patches, woven patches and decorative style patches.
3. Blind Stitch (Invisible Stitch)
- Operation: Minimize the exposed thread on the patch surface, most stitches hide on the fabric back.
- Features: Almost invisible on the front, high-grade appearance.
- Applicable: Formal costumes, high-end apparel and occasion dresses.
Standard Hand Sewing Process
- Thread the needle and tie a knot at the thread end, start sewing from the inner side of the fabric to hide the knot.
- Sew along the patch outline steadily, keep consistent stitch length and tension.
- Slow down at corners and curved parts to avoid edge warping.
- After finishing the circle, loop the thread several times on the back to fasten, then cut excess thread.
- Remove positioning pins and tidy up the surface.

Part 5: Machine Sewing Tutorial (Efficient for Large Quantities)
1. Machine Settings
- Stitch type: Straight stitch or zigzag stitch (recommended for edges).
- Stitch length: 2.5–3.5mm, moderate density.
- Thread: Use high-strength sewing thread, upper and lower thread keep consistent color.
- Pressure foot: Ordinary universal pressure foot for flat patches; walking foot for thick denim.
2. Operation Steps
- Fix the patch with pins firmly to prevent displacement during high-speed operation.
- Lower the pressure foot and start sewing slowly along the patch edge.
- Reduce speed obviously at corners and curved contours, turn direction gently.
- Sew two rounds for large and heavy patches to enhance firmness.
- Backstitch 2–3 stitches at the start and end points to prevent thread loosening.
- Cut thread and remove all positioning pins after completion.
3. Machine Sewing Advantages
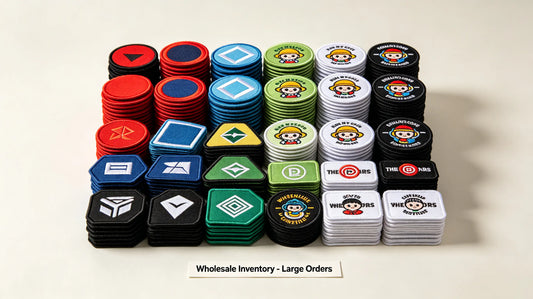
Fast speed, uniform stitches, high efficiency, perfect for uniform bulk processing and mass production.
Part 6: Sewing Skills for Special Shapes & Crafts
1. Square & Rectangular Patches
- Strengthen four corners with dense stitches, which are the most prone to wear and loosening.
- Keep straight stitches parallel to edges for a tidy look.
2. Round & Oval Patches
- Sew slowly along the radian, do not pull the fabric forcibly.
- Keep stitch spacing even to avoid irregular outline.
3. Irregular & Jagged Edge Patches
- Follow every outline curve and corner one by one, do not skip complex parts.
- Use whip stitch to wrap sharp edges and prevent fraying.
4. 3D Foam Patches
- Do not press hard during sewing to avoid foam collapse.
- Choose stitches close to the edge, avoid piercing the raised stereo area.
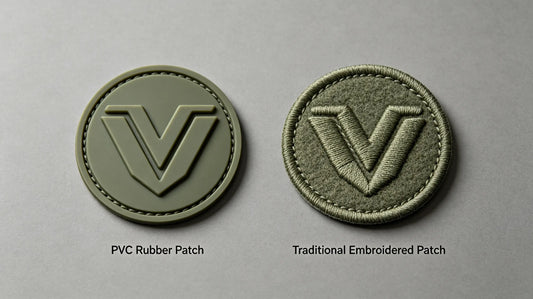
5. Thick PVC Patches
- Use thick needle and strong thread, reduce sewing speed to prevent needle breakage.
- Double stitch around the edge for enhanced fixation.

Part 7: Post-Sewing Finishing & Maintenance
- Trim all loose threads on both front and back sides to keep clean.
- Check every section of stitches, re-sew any loose or broken parts in time.
- For newly sewn patches, avoid strong pulling within 24 hours.
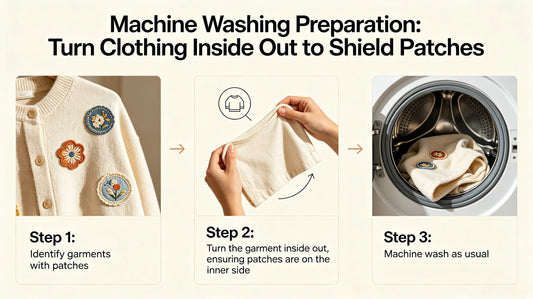
- Normal washing is allowed; sew-on stitches will not fall off after long-term use.
- If individual stitches wear out after years of use, perform partial repair.
Part 8: Common Sewing Mistakes & Solutions
- Uneven stitch length and messy lines → Control hand movement speed; adjust machine stitch parameters uniformly.
- Patch edge warps upward → Fix enough positioning pins before sewing, keep even thread tension.
- Needle breaks when sewing thick patches → Replace with thick heavy-duty needle, slow down the operation.
- Thread loosens at start and end → Do backstitch or multi-loop fastening to fix thread ends.
- Pinholes left on thin fabric → Choose fine needle, reduce stitch density reasonably.

Final Summary Core Rule
Sew-on patches fit all fabrics and crafts. Choose hand sewing for fine appearance and machine sewing for high efficiency; match stitch style by patch shape, use thick needle and strong thread for heavy patches. Fix position with pins before sewing, strengthen corners and edges, tidy up threads after completion. Standard sewing ensures permanent and neat fixation.
Frequently Asked Questions
Q1: Which is firmer, hand sewing or machine sewing patches?
A: Both are durable; machine sewing has denser stitches, while fine hand sewing looks more elegant.
Q2: What stitch is best for irregular edge patches?
A: Whip stitch is recommended to wrap edges and prevent fraying.
Q3: Do I need special needles for sewing denim with patches?
A: Yes, use thick heavy-duty needles to avoid needle breakage.
Q4: Can sew-on patches be used on elastic fabrics?
A: Yes, sew-on is the most reliable choice for elastic materials.
Tags:
Previous
Custom Patch Iron-On Backing Guide | Application Steps, Temperature Control & Troubleshooting
Next
Custom Patch Gift & Souvenir Guide | Selection, Matching, Packaging & Gifting Ideas