Custom Patch Iron On Backing Guide | Application Steps, Heat Settings, Wash Durability & Common Fail Fixes
Iron-on patch backing offers a fast, tool-free and convenient alternative to sewing, allowing ordinary users to attach custom patches to garments at home without professional skills. It is widely used for casual jeans, jackets, backpacks and children’s clothing. Despite its convenience, many users encounter premature peeling, edge lifting, bubbling or falling off after washing. Most failures result from mismatched temperature, insufficient pressure, uneven heating or skipping protective steps. Mastering standardized heat settings and correct operation methods can turn temporary bonding into long-term wash-resistant permanent adhesion.
Custom 3D embroidered patches uses high-quality industrial hot-melt glue for iron-on backing, providing stable heat activation and excellent wash resistance for all custom iron-on patch orders.

Part 1: Standard Industry Heat & Time Settings By Patch Type
1. Embroidered Iron-On Patches
Temperature: 150°C – 160°C (302°F – 320°F)
Press Time: 15–20 seconds per area
Medium-high temperature fully activates hot-melt glue without scorching embroidery threads. Suitable for cotton, polyester, denim and blended fabrics.
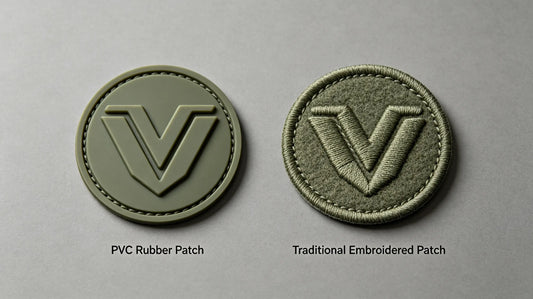
2. PVC Rubber Iron-On Patches
Temperature: 130°C – 140°C (266°F – 284°F)
Press Time: 20–25 seconds per area
PVC material is heat-sensitive; excessive high temperature will deform rubber surface. Slightly lower temperature ensures safe and firm bonding.
3. Woven Iron-On Patches
Temperature: 145°C – 155°C (293°F – 311°F)
Press Time: 15 seconds per area
Thin woven texture heats evenly, fast activation achieves flat and clean bonding effect.

Part 2: Universal 6-Step Perfect Iron-On Application Process
Step 1: Clean & Flat The Fabric
Remove all dust, wrinkles and lint on the garment surface. Wrinkles cause uneven pressure and create hidden air bubbles leading to peeling.
Step 2: Preheat Iron / Heat Press
Adjust temperature according to patch type, turn off steam function completely — steam moisture will invalidate hot-melt glue adhesion.
Step 3: Position The Patch Accurately
Place the patch on the target position with the glue side fully contacting the fabric, confirm alignment before heating (no repositioning after activation).
Step 4: Cover With Protective Cloth
Lay a thin cotton cover cloth over the patch to prevent direct high-temperature scorching of threads, rubber and printed surfaces.
Step 5: Heat Press With Even Pressure
Apply steady firm pressure for the standard time range. Do not drag or slide the iron; fixed vertical pressing avoids pattern offset.
Step 6: Cool Down Naturally
Leave the patch static until completely cool. Glue solidifies during cooling; moving it while hot causes immediate edge lifting.

Part 3: Wash Durability & Service Lifespan Rules
High-Quality Iron-On Patch Lifespan
Correctly applied industrial iron-on patches can withstand 20–30 standard cold water washes, maintaining firm adhesion for 1–2 years of daily use.
Factors That Shorten Durability
- Hot water washing and high-temperature dryer baking
- Hard rubbing on patch edges during cleaning
- Early friction before full glue solidification
- Steam ironing after installation
Part 4: Common Iron-On Failure Issues & Quick Fix Solutions
1. Patch Edge Lifting
Cause: Insufficient edge pressing time or uneven fabric surface
Fix: Reheat the loose edge with cover cloth, press firmly and cool naturally
2. Air Bubble Formation
Cause: Air trapped between patch and fabric during pressing
Fix: Puncture tiny bubble spot, re-press with heat to exhaust air and re-bond
3. Entire Patch Falling Off
Cause: Temperature too low or steam used during ironing
Fix: Fully remove residual moisture, re-adjust standard temperature and re-press
4. Patch Surface Scorching
Cause: No cover cloth or over-high temperature
Fix: Follow craft-specific temperature standards and always use protective fabric

Part 5: Suitable & Unsuitable Fabrics For Iron-On Patches
Perfect For Iron-On Backing
Cotton, denim, polyester, blended fabric, canvas, thick textile materials with flat tight texture.
Not Recommended For Iron-On Backing
Fleece, wool, silk, ultra-thin sheer fabric, waterproof coated fabric and high-elastic loose textiles. These materials cannot sustain stable heat bonding and easily peel off.
Part 6: Top Iron-On Operation Mistakes To Avoid
- Using steam iron during application → moisture destroys hot-melt glue activity
- Moving iron sideways while pressing → patch offset and uneven bonding
- Removing or touching patch before cooling → irreversible edge lifting
- Overheating PVC patches for stronger adhesion → rubber deformation and surface damage
- Skipping protective cover cloth → thread scorching and patch discoloration

Final Summary Core Rule
Embroidery = 150–160°C; PVC = 130–140°C; turn off steam, use cover cloth, fixed vertical pressure, cool naturally; flat thick fabric fits iron-on best; avoid fleece and silk; re-heat loose edges for quick repair; correct operation guarantees 20+ wash cycles.
Standard ironing procedures create permanent, durable iron-on patch effects without sewing.
Frequently Asked Questions
Q1: Can iron-on patches last long-term on clothing?
A: Yes, properly applied industrial iron-on patches can last 1–2 years and withstand 20–30 washes.
Q2: Why do my iron-on patches keep falling off?
A: Mostly caused by steam usage, insufficient temperature, uneven pressure or moving the patch while hot.
Q3: Can I iron PVC rubber patches with high temperature?
A: No, PVC requires lower heat settings; excessive temperature will deform the rubber patch.
Q4: Do I need cover cloth for iron-on patch application?
A: Yes, a protective cloth prevents scorching and ensures clean, undamaged patch surfaces after pressing.
Tags:
Previous
Custom Patch Self-Adhesive Backing Guide | Usage, Durability, Removing Residue & Suitable Application
Next
Custom Patch Sew On Backing Guide | Professional Stitching Tips, Durability & Best Usage Scenarios