Custom Patch Artwork Guide | File Format, Resolution, Line Thickness & Design Submission Rules
Whether you create designs yourself or hire a designer, following unified artwork standards directly decides the accuracy of the final patch. Blurry pixels, ultra-thin lines, messy color modes and unoutlined text are the top reasons for production failure and repeated revision. Different crafts including embroidery, woven and PVC also have differentiated design limits on lines, fonts and colors. Mastering these rules can greatly shorten proofing cycles, cut extra modification costs and make the finished patch highly consistent with your original vision.
Custom 3D embroidered patches accepts multiple mainstream file formats, provides free artwork review and minor optimization for all custom orders to ensure files meet production standards.

Part 1: Acceptable File Formats & Priority Ranking
1. Vector Files (Highest Recommendation, Production Preferred)
- Supported formats: AI, EPS, SVG, CDR
- Advantages: Infinite zoom without pixelation, clear outline, editable lines and colors, ideal for all patch crafts
- Application: Formal bulk orders, brand logos, complex graphics and multi-color designs
2. High-Resolution Raster Images (Acceptable Alternative)
- Supported formats: PNG (transparent background), JPG, TIFF
- Resolution requirement: Minimum 300 DPI, size matching actual finished patch dimension
- Notes: Avoid compressed low-definition screenshots and web pictures; transparent PNG is recommended for irregular shapes
3. Files Not Recommended / Unusable
- Web screenshots, compressed thumbnails, blurred photos below 150 DPI: Serious pixel distortion after digitizing
- PDF with embedded low-resolution images: Cannot extract clear vector lines for production

Part 2: Universal Line Thickness Standards (Core Production Rule)
Line thickness is the most critical restriction for patch craftsmanship, too thin lines will fuse or disappear during production.
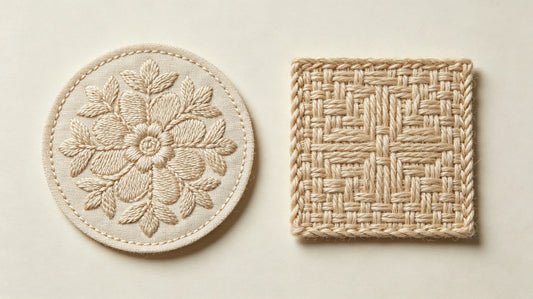
Embroidered Patches
- Minimum line thickness: 2mm
- Lines thinner than 2mm will pile up threads or break easily, leading to incomplete patterns
Woven Patches
- Minimum line thickness: 1mm
- Fine weaving supports thinner lines, but ultra-fine lines below 1mm still cause fuzzy edges
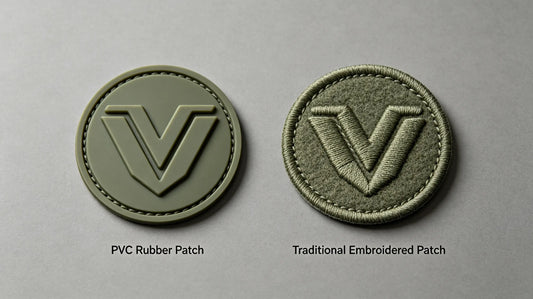
PVC Rubber Patches
- Minimum line thickness: 1.5mm
- Too thin lines cannot form complete rubber structure during injection molding and will stick together

Part 3: Text & Font Design Rules
- Minimum text height
- Embroidery: Letters no less than 3mm high for normal readability
- Woven: Letters no less than 2mm high, suitable for tiny label text
- PVC: Letters no less than 2.5mm high to avoid font deformation
- Font selection
- Avoid overly slender, hollow and intricate artistic fonts for small patches
- Bold sans-serif fonts are the most stable and easiest to restore for all crafts
- Text outline
- Add clear outer outline for small text; prevent letters from blending into background color blocks
Part 4: Color Mode & Color Setting Rules
-
Color Mode Selection
- Professional production: Use CMYK color mode for accurate color restoration
- Regular customer design: RGB is acceptable, factory will adjust color tone uniformly
- Note: Do not mix multiple color modes in one file
-
Color Quantity Limit
- Embroidery: No strict upper limit, but too many colors increase thread change times and production time
- Woven: Control within 8 colors to avoid rising loom setup cost
- Standard PVC: Each independent solid color needs separate mold cavity, reasonably control color count
-
Gradient & Shadow Effect
- Embroidery & Woven: Standard crafts cannot realize natural gradient; convert gradients into segmented solid color blocks
- PVC: Ordinary injection molding does not support gradient; extra printing process is required for color transition

Part 5: Craft-Specific Artwork Adjustment Tips
For Embroidered Patches
- Simplify overly dense tiny details; remove scattered mini patterns that cannot be presented clearly
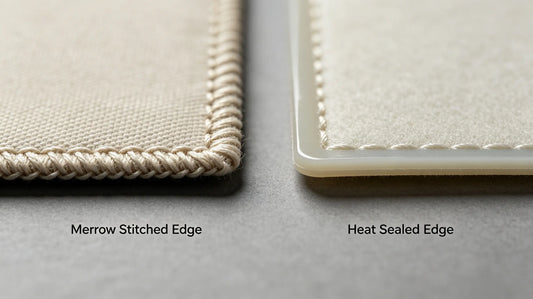
- Reserve 0.2–0.3 inch blank space near the edge for merrow border stitching
For Woven Patches
- Prioritize concise lines and block colors; reduce complex layered patterns
- Ensure color contrast between lines and background to guarantee definition
For PVC Patches
- Merge disconnected tiny graphic parts; keep the overall pattern connected as much as possible
- Avoid sharp tiny corners, properly round sharp angles to prevent mold demolding problems
Part 6: Pre-Submission Artwork Checklist
- Confirm file format and resolution; low-DPI pictures must be replaced
- Measure all lines and text to meet minimum thickness/height standards
- Check and convert gradient, shadow and special effects into solid colors
- Verify color separation, no overlapping or missing color blocks
- Confirm patch overall shape and edge range, reserve border space
Part 7: Common Artwork Mistakes To Avoid
- Use web screenshots or low-res images as production files → severe pixelation after finished
- Design lines/text below the minimum thickness standard → patterns disappear or stick together
- Retain gradient and shadow effects for ordinary embroidery/PVC → cannot be restored by standard craft
- Mix multiple color modes or chaotic color layers → color deviation and production confusion
- Leave no blank space near edges → core content is covered by merrow border

Final Summary Core Rule
Vector AI/EPS is the best artwork format; 300 DPI minimum for pictures; follow different minimum line & text size by craft; convert gradient effects to solid colors; check lines, text and colors before submission. Qualified artwork is the guarantee of high-precision custom patches.
Standardized design files greatly improve production efficiency and finished product quality.
Frequently Asked Questions
Q1: What is the best file format for patch production?
A: Vector files like AI and EPS are the first choice for clearest production effect.
Q2: What is the minimum line thickness for embroidered patches?
A: Embroidery lines should not be thinner than 2mm to avoid missing or fused patterns.
Q3: Can standard embroidered patches make gradient colors?
A: Regular embroidery cannot realize natural gradients; convert to segmented solid colors instead.
Q4: What resolution is required for picture files?
A: Raster images need at least 300 DPI to ensure clear patch details.
Tags:
Previous
Custom Patch Size Guide | Standard Dimensions, Size Selection Rules & Design Adaptation Tips
Next
Custom Patch Embroidery Thread Guide | Thread Types, Color Matching, Thickness & Selection Rules