Custom Embroidered Patches Design Guide: Optimize Your Artwork for Perfect Results
Creating a stunning design for your custom embroidered patches is exciting—but even the most creative design can fall flat if it’s not optimized for embroidery. Unlike digital designs or printed graphics, embroidery relies on threads, stitching density, and material limitations to bring your vision to life. The good news? With a few simple design tweaks, you can ensure your artwork translates seamlessly into a high-quality, durable embroidered patch that matches your exact vision.
Whether you’re designing a corporate logo, team badge, morale patch, or personal DIY design, optimizing your artwork is key to avoiding common pitfalls—like blurry details, faded colors, or misshapen elements. In this guide, we’ll break down the essential design optimization tips, from choosing the right file format to selecting thread colors and adjusting details, so your premium embroidered patches turn out flawless every time.
Why Design Optimization Matters for Embroidered Patches
Embroidery is a unique craft that uses threads to create texture and detail—unlike printing, which lays ink flat on a surface. This means certain design elements (like tiny text, complex patterns, or gradient colors) can be difficult to replicate with stitching. Design optimization ensures your artwork is tailored to embroidery’s strengths, highlighting bold details, ensuring color accuracy, and avoiding elements that could compromise the patch’s quality or durability.
A well-optimized design not only looks better but also reduces production time and costs—no revisions needed. When you work with a reputable supplier, they’ll help refine your design, but understanding the basics of optimization will help you create artwork that’s ready for embroidery from the start, whether you’re ordering small-batch custom patches or bulk orders.

1. Choose the Right File Format (Critical for Accuracy)
The first step in optimizing your custom embroidered patch design is selecting the right file format. Your supplier needs a high-quality file to digitize your artwork into stitching instructions—and the wrong format can lead to blurry details or distorted shapes.
Recommended File Formats (Ranked by Priority)
-
Vector Files (AI, EPS, PDF): These are the best choice for embroidery. Vector files are scalable (they don’t lose quality when resized) and allow your supplier to easily adjust details, colors, and shapes for stitching. Most professional designers use vector files for custom patch artwork.
-
High-Resolution Raster Files (PNG, JPG, PSD): If you don’t have a vector file, high-resolution raster files (300 DPI or higher) work as a backup. Avoid low-resolution images (like blurry photos or small icons)—they’ll result in blurry stitching.
What to Avoid
Low-resolution files (less than 300 DPI), blurry photos, screenshots, or hand-drawn sketches (without a digital version) can make it hard for your supplier to digitize your design accurately. If you only have a rough sketch or low-res image, don’t worry—reputable suppliers (like those offering custom embroidered patches) will optimize and vectorize your file for free.

2. Optimize Details for Embroidery (Less Is More)
Embroidery stitching has limitations—tiny details, thin lines, or overly complex patterns can be difficult to replicate without looking messy. The key is to keep your design bold and simple, focusing on the most important elements.
Detail Dos & Don’ts
-
Do: Use bold, thick lines (at least 1mm wide) for outlines and text. Thick lines ensure the stitching is visible and doesn’t fray.
-
Don’t: Use tiny text (smaller than 0.5 inches). Embroidery threads can’t capture small text clearly—opt for larger, bold fonts instead.
-
Do: Simplify complex patterns. If your design has intricate details (like small icons or fine lines), simplify them to ensure they translate well to stitching.
-
Don’t: Use gradient colors or subtle color shifts. Embroidery uses solid thread colors—gradients will look choppy or muddy when stitched.
-
Do: Leave space between elements. Crowded designs can make stitching look messy—add small gaps between text, icons, or shapes to keep the patch clean.
Text Optimization Tips
Text is one of the most common design elements for custom embroidered patches—but it’s also one of the easiest to mess up. Use sans-serif fonts (like Arial or Helvetica) for maximum readability—serif fonts (with small decorative lines) can be hard to stitch clearly. Avoid script fonts with tight curves or small loops—they often get lost in stitching.

3. Choose the Right Colors (Color-Fast & Contrasting)
Thread color choice is crucial for both aesthetics and durability. High-quality custom embroidered patches use color-fast polyester threads that resist fading, but choosing the right color combination will make your design stand out and ensure readability.
Color Optimization Tips
-
Use Contrasting Colors: Pair light threads with dark backgrounds (and vice versa) to make your design pop. For example, white text on a black patch or black text on a white patch is highly readable.
-
Stick to 5–7 Colors Max: Too many colors can make the patch look cluttered and increase production costs. Focus on your brand’s core colors or the most important colors in your design.
-
Choose Color-Fast Threads: Opt for polyester threads (not cotton) for maximum fade resistance. Polyester threads hold color better through washing, sunlight, and heavy wear.
-
Test Color Combinations: Ask your supplier for a free digital mockup to see how your color choices will look in embroidery. This helps you avoid mismatched colors or hard-to-read elements.
Specialty Thread Options
If you want to elevate your design, consider specialty threads—like metallic (gold/silver) or glow-in-the-dark threads. These threads add a unique touch to premium embroidered patches and are perfect for high-end club crests, special event merchandise, or morale patches. Just note that specialty threads work best with bold designs—they can highlight details but may not be ideal for tiny elements.

4. Select the Perfect Patch Size (Fit for Your Design & Use Case)
The size of your custom embroidered patch impacts both design visibility and functionality. A patch that’s too small will lose details, while a patch that’s too large may overpower the garment or gear it’s attached to. Here’s how to choose the right size:
Size Guidelines by Use Case
-
Small Patches (1–2 inches): Ideal for hats, beanies, or small accessories. Keep designs simple (e.g., a small logo or icon) to avoid losing details.
-
Medium Patches (2–4 inches): The most versatile size—perfect for jackets, backpacks, uniforms, and team badges. Works well for designs with text and simple graphics.
-
Large Patches (4+ inches): Great for jackets, vests, or tactical gear. Can accommodate more complex designs (e.g., detailed logos or multi-element artwork) without losing clarity.
Size & Detail Balance
If your design has lots of details (text, icons, patterns), opt for a larger patch to ensure those details are visible. For simple designs (e.g., a single icon or word), a smaller patch works perfectly. Remember: the smaller the patch, the bolder your design needs to be.

5. Choose the Right Embroidery Style (Match Your Design Vision)
Different embroidery styles work best for different design types—choosing the right style will enhance your artwork and ensure it translates well to stitching. Most suppliers offer four core embroidery styles, each with unique benefits:
Embroidery Style Guide
-
2D Flat Embroidery: The most common style, offering 50%, 75%, or 100% thread coverage. Perfect for crisp corporate logos, uniform badges, and classic team crests. Ideal for designs with bold lines and solid colors.
-
3D Puff Embroidery: Uses premium foam beneath the stitching to create a striking 3D texture. Perfect for hats, streetwear, and bold brands. Works best with simple, bold designs (avoid tiny details).
-
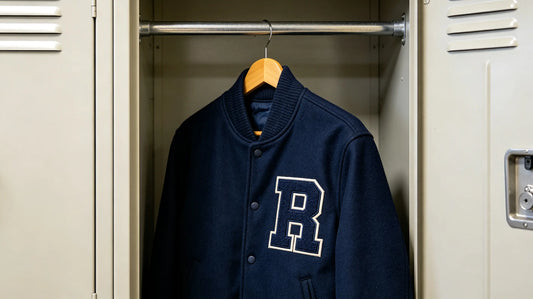
Vintage Chenille Embroidery: Features a soft, towel-like texture for a classic collegiate look. Ideal for varsity jackets, letterman apparel, and vintage fashion brands. Great for large, bold designs with minimal fine details.
-
Specialty Embroidery: Uses metallic or glow-in-the-dark threads to add a unique touch. Perfect for high-end or special event patches. Works best with bold, simple designs to highlight the specialty thread.
6. Work with Your Supplier (Leverage Free Design Optimization)
Even if you’re not a professional designer, you can create a great custom embroidered patch design by working with your supplier. Reputable suppliers that offer custom embroidered patches provide free design optimization and digital mockups, so you can see exactly how your design will look before production.
How to Collaborate with Your Supplier
-
Share your design file (or rough sketch) and explain your vision—be clear about colors, size, and embroidery style.
-
Review the free digital mockup carefully—check for blurry details, color mismatches, or sizing issues.
-
Ask for revisions if needed—most suppliers offer unlimited revisions to ensure your design is perfect.
-
Trust their expertise—suppliers know what works for embroidery and can suggest tweaks to improve your design (e.g., thickening lines or simplifying details).
Common Design Mistakes to Avoid
Even with the best intentions, it’s easy to make design mistakes that compromise your custom embroidered patches. Here are the most common pitfalls to steer clear of:
-
Using Low-Resolution Files: Blurry or pixelated files lead to blurry stitching—always use vector or high-res raster files.
-
Overcomplicating the Design: Too many details, colors, or text will make the patch look messy—keep it simple and bold.
-
Choosing Poor Color Contrast: Similar colors (e.g., light gray on white) make the design hard to read—use contrasting colors.
-
Ignoring Patch Size: A design that’s too detailed for a small patch will lose clarity—match your design complexity to your patch size.
-
Forgetting About Backing: Your design should complement your backing choice (e.g., a large, heavy design works best with sew-on or hook & loop backing).
Final Thoughts: Great Design = Great Embroidered Patches
Design optimization is the key to creating custom embroidered patches that look stunning, last long, and match your vision. By choosing the right file format, simplifying details, selecting contrasting colors, and working with your supplier, you can ensure your artwork translates seamlessly into a high-quality patch.
Whether you’re designing patches for your brand, team, event, or personal use, taking the time to optimize your design will make all the difference. Remember, a well-optimized design not only looks better but also saves time and money—no revisions, no mistakes, just perfect patches every time.
FAQ (Design-Focused)
Q: What if I don’t have a professional design file? A: No problem! Most reputable suppliers will optimize and vectorize your rough sketch or low-res image for free—just send them what you have, and they’ll refine it for embroidery.
Q: Can I use photos in my embroidered patch design? A: Photos are hard to replicate with embroidery—they have too many details and gradient colors. Instead, simplify the photo into a bold, graphic design (e.g., a silhouette or simplified icon).
Q: How many colors can I use in my design? A: We recommend 5–7 colors max. Too many colors make the patch cluttered and increase production costs. Stick to your core brand colors for the best results.
Q: Can I change my design after approving the mockup? A: Most suppliers allow revisions before production—just let them know if you need to adjust colors, details, or size. Once production starts, changes may not be possible.
Q: What embroidery style is best for my logo? A: For crisp, professional logos, 2D flat embroidery is best. For bold, eye-catching designs (like hats or streetwear), 3D puff embroidery works great. Vintage-style logos pair well with chenille embroidery.
Tags:
Previous
Custom Embroidered Patches Backing Guide: Choose the Right One for Your Project
Next
Beyond Design & Durability: Unconventional Uses for Custom Embroidered Patches